Support
Getting Started with Computer Audio
Page Created November, 2010. Last update March 2023.
|
|
The information on this web page is a culmination of about 20 years worth of experience with high performance computer audio systems, almost exclusively based upon the Apple Macintosh platform. In the process of working with computer audio, we have learned a great deal through painstaking trial and error to find the best path to the sublime sound quality delivered by computer audio playback.
If you are just learning about computer audio - yes, there was such a thing as high performance computer audio, over 20 years ago - considerable patience and technical expertise (in both audio and computers) were required back then to work with it (perhaps "tolerate" would be a better word).
Things have changed a lot. Computer experience is no longer a prerequisite, and there never was a better time to get started with computer audio than now. We can help by bringing the experience gained from toiling "in the trenches of computer audio" to bear in making the process as simple and easy as possible.
Audiophiles are extremely fortunate today to have such a range of choices available, combined with the ease of use that goes along with today's computer audio products. Keep in mind, however, that effectively using computer audio does, as is true of anything new, take a bit of time to learn some new terminology. That is part of the purpose of this web page - to help as a guide to this terminology.
There are only three things needed for computer audio: the computer, the audio interface / DAC, and music storage (external hard drive). Other sections below cover peripherals you may want to consider or eventually upgrade. However, the base configuration of any of the computer choices mentioned below, plus an audio interface and hard drive, are all that you need to get started.
Computer audio opens up a whole new world of ways of enjoying your music - and besides, is quite a lot of fun!
|
|
|
...is as simple as inserting a CD into the computer. A couple minutes later, the entire contents of the CD - the music tracks - will have been copied to your hard drive, for ease of playback in software such as iTunes, included with the computer. (iTunes comes preinstalled on all Macintosh computers.) The entire process can be automated so that manual intervention is not usually required, and each CD automatically ejected when the transfer is finished. Then, just pop in the next CD to continue.
High resolution digital music also can be purchased and downloaded from a number of music suppliers on the Internet.
If you have a vinyl or tape collection, or wish to record analog radio broadcasts, etc., all of this is easily accomplished with the proper software, such as Channel D Pure Vinyl, plus the proper computer audio hardware ("audio interface"). Audio interfaces that are suitable for this task (recording, which requires an ADC or analog to digital converter), are highlighted below in other sections.
|
|
|
Windows / Linux: There are many configuration options available on the Windows or Linux platforms. Seasoned computer users with very specific requirements may choose to use Windows or Linux for computer audio. Setup can be complicated and tedious (and with Linux, complicated to the point of impracticality for a new computer user).
Channel D audio software products are designed to run on the Apple Macintosh platform.
Our goal is to reduce, not increase the complexity of setting up a computer audio system, and to make it as pleasant an experience as possible. For meeting this goal, the Apple Macintosh platform is generally acknowledged as the best choice. (The Mac platform commands a large share of the professional audio recording market, as well.) Channel D has over 26 years of continuous experience developing application software for the Apple Macintosh platform.
Following is a brief description of the choices of Macintosh computer models. Additional configuration options are listed later (under Memory, Music Storage, etc). However, any of these systems will offer excellent performance in their base configurations, with nothing extra to buy (except an audio interface / DAC and external hard drive for music storage, plus some additional RAM). Which model to choose comes down mainly to your own personal preferences and usage scenario. Music server systems assembled with any of the computers listed below may be operated remotely either via wired or wireless connections.
Choosing the computer is usually the first step in the process of setting up a computer music system. The reason is that the choice of Mac computer model will, to some extent, also dictate the choice of audio interface / DAC (based on Audio Interface Connection Options).
Desktop Computer Choices
Mac Mini (2011 and later models) (See Drives for CD Ripping below for optical drive options)
Mac Mini (2010 Model)
Mac Mini is the easiest choice to recommend in the Mac computer line. It offers essentially silent operation, low power consumption, and an unobtrusive footprint. Can be operated (using various remote control options) without having a monitor, keyboard or mouse, but these peripherals will be needed for initial setup. Select the least expensive base model with 2 GB RAM (it is simple to expand memory later). For the 2011 models, consider the 2.5 GHz model, which has a dedicated graphics coprocessor and separate graphics memory, which are worth the price bump (even if run "headless" without a monitor attached). (The more expensive OS X Server configuration is not designed with single user operation in mind, and shouldn't be purchased for use as a computer audio source.) Audio Interface Connection Options: Thunderbolt, FireWire, USB; alternative digital connections: optical, HDMI (mid-2010 and later models).
Late 2012 Mac Mini We have tested the new Fusion drive (tiered SSD / platter combination) equipped model and this is an excellent choice for inclusion in a Mac Mini based computer audio system (although lately, the price of the SSD-only upgrade has been reduced and is now equivalent, making the SSD a better choice for computer audio). Further, the 2.6 GHz Build To Order quad-core processor upgrade gives a worthwhile additional performance boost to overall computer responsiveness. Buy third party memory upgrades to save money.
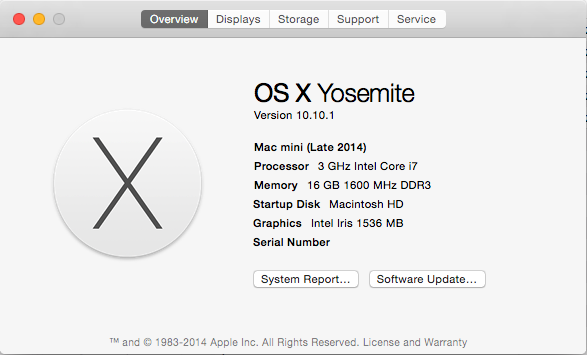
Late 2014 Mac Mini Unlike the earlier Unibody (Mid - 2010 through Late 2012) Mac Mini models, the 2014 model's RAM is not user-upgradeable. We recommend ordering the computer with the 16 GB build to order (BTO) RAM option. For highest performance, a BTO configuration would be:
- 3.0GHz Dual-Core Intel Core i7 (Turbo Boost up to 3.5GHz and Hyperthreading)
- 16GB 1600MHz LPDDR3 SDRAM
- 512GB PCIe-based Flash Storage
We've purchased a sample of the above BTO configuration for our testing inventory. The most remarkable thing (in addition to the excellent performance) is that the exterior of the computer remains at room temperature even after playing a mix of tracks continuously with Pure Music (including upsampling all CD format tracks to 384 kHz) for several days. Under the same conditions, our Late 2012 model Mac Mini gets quite warm to the touch.
We don't recommend the entry-level $499 Mac Mini. That model has a slower 1.4 GHz CPU and only 4 GB RAM standard, which would need to be ordered with at least 8 GB RAM for playing high-resolution computer audio files (24 bit, 88.2 kHz or higher) - an additional expense. However, as a minimum configuration, the middle Mac Mini model is recommended as it includes a faster 2.6 GHz processor and comes standard with 8 GB RAM; well worth the $200 price difference over the bottom end model (only $100 difference once the RAM configuration is considered).
iMac 27" and Apple wireless Magic Mouse
iMac: built in monitor, includes keyboard and mouse. Audio Interface Connection Options: (pre- 2012, or on Thunderbolt models via Apple adapter), USB, Thunderbolt (2012 and later); alternative digital connections: optical.
Note: in the late - 2012 iMacs, because of the new slim design, memory is not easily upgradeable, so this should be configured at the time of purchase. All models are shipped with 8 GB RAM, but given the difficulty of upgrading later, if budget is not an issue we recommend purchasing the 16 GB memory upgrade. (As of the time of this writing, the 27 inch model iMac has user-upgradeable RAM.)

2010 - 2012 Mac Pro shown with iPad and Apple wireless Magic Mouse
2010 - 2012 Mac Pro: Large enclosure and footprint, with high performance. Nearly silent during typical operation (the low turbulence fans are audible as a faint, low pitched movement of air only when holding an ear next to the computer). Very easy to expand internally. Adding memory or disk drives takes a few minutes and can be accomplished without tools. Internally, can accommodate over 12 terabytes of hard disk storage (using the latest 3 TB disk drives). The 2010 - 2012 Mac Pro models have the lowest energy consumption and highest perfomance of any prior Mac Pro, and include top-shelf, server-class components (Xeon processor and ECC parity RAM). Recommended optimum, high performance configuration for audio is the quad-core base model, with the 3.33 GHz 6-core CPU option plus Radeon 5870 graphics card upgrade. As explained elsewhere, purchase with base RAM, then add your own later. Audio Interface Connection Options: FireWire, USB, PCIe; alternative digital connections: optical. Note: It is not possible to add a Thunderbolt port, even via PCI cards.
Late 2013 Mac Pro: The redesigned Mac Pro features lightning fast PCIe flash storage and a new, much smaller enclosure. Requires external Thunderbolt or wired Ethernet NAS for mass storage of music files (USB 3 is a possible option, but Thunderbolt or a NAS drive is a better choice given their faster performance).
The 2014 and later model iMac Retina, MacBook Pro and Mac Minis also can be configured with PCIe flash; given the lower cost, and substantially lower energy consumption, this makes them a better choice for most users than any model Mac Pro. (As far as expandability, they are all on the same terrain: PCI expansion cards can only be added via third-party Thunderbolt expansion chassis. This isn't a consideration for computer audio; just mentioning it for advanced computer users.)
Laptop Computer Choices
In general, any desktop computer listed above will be a better choice than a laptop, if the computer is intended to be used exclusively with an audio system, and portability isn't an important consideration. The internal disk drive and other components in laptops are designed with energy consumption / battery runtime in mind, and offer lower performance than their desktop counterparts (but there are ways of overcoming this; for example, replacing the hard drive with a solid state drive). Laptop computers also should be operated with the power adaptor connected when used for playing high performance audio. There is no advantage to operating from the internal battery, and this can actually adversely impact audio playback performance. The primary reason is that energy conservation measures taken by the computer operating system to increase battery runtime will reduce computer performance. This reduction may not be noticeable during typical computer use, but can have a critical impact while playing audio.
Update: this situation has been ameliorated with the introduction of the latest MacBook Pro computers with Intel Core i5 and i7 processors. The power consumption to performance ratio of these machines has been improved, which reduces the extent of CPU throttling necessary to extend battery life.
MacBook Pro laptop (2010 or later with Core i5 or i7 processor). Audio Interface Connection Options: FireWire (pre- 2012, or on Thunderbolt models via Apple adapter), USB, Thunderbolt (2012 and later); alternative digital connections: optical.
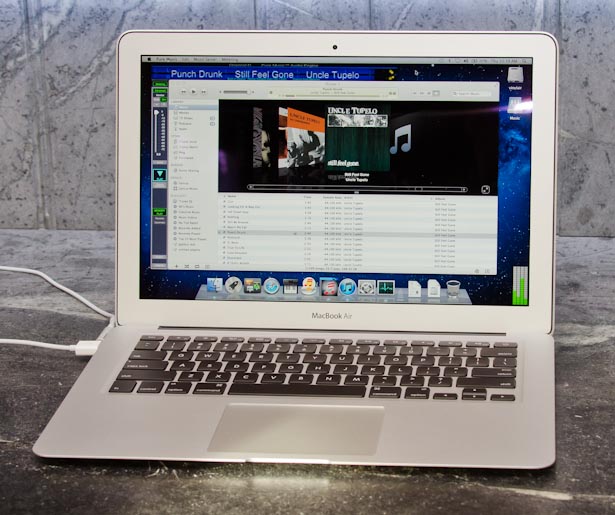
2011 MacBook Air 4 GB
MacBook Air laptop. The latest model may be configured with 8 GB (strongly recommended) build to order RAM, which must be configured at time of purchase (not upgradeable). Audio Interface Connection Options: USB and Thunderbolt (2012 and later); alternative digital connections: optical.
|
|
|
No problem using an old Mac computer. Any Macintosh that allows installing OS X 10.5 or later (for using Channel D audio software products) will be suitable. This includes all Intel processor, G4 and G5 Macs. However, the best performance will be obtained with the newest model Mac computers.
One possible issue with using old Macs, is if the currently installed OS is 10.4 or earlier. Apple has ceased distribution of OS 10.5 upgrades, so obtaining a copy of this OS may be troublesome. However, ask at an Apple store or call Apple sales directly, and explain that you'd like to update a PowerPC processor Mac to the latest OS, and they will be able to assist in obtaining a copy (it is a paid upgrade from OS X 10.4, so you should weigh this expense against the cost of buying a new computer).
If you want to use Channel D Pure Vinyl or Pure Music to stream (using the Netsend feature) high-resolution audio to another computer on the network, there is essentially no minimum requirement for the receiving computer. The receiving computer only needs to run a free application called AULab. See the product documentation for Channel D Pure Music for more information.
Note: if you are planning on purchasing a Mac oomputer (don't already have one), we strongly advise against buying a used Mac. Used Macs hold their value very well; consequently, the price difference between used and new is usually marginal. By purchasing a new Mac you will be buying into the latest technology and performance, which translates into responsiveness. The more responsive the computer, the more fun it is to use; and having fun is what this is all about. The new Mac "unboxing" experience also is part of the fun; something we've never tired of despite having done it dozens of times in keeping our testing inventory populated with the latest models.
|
|
|
Besides the computer, one additional hardware component is required for computer audio: an audio interface. A DAC is one example of a type of audio interface.
DAC stands for Digital to Analog Converter (sometimes ambiguously used to stand for digital audio converter). This converts the digital audio residing on the computer hard drive into analog audio. The analog outputs are connected to the rest of your audio system. The DAC connects to the computer via a single cable.
(Note: for the highest quality audio playback, it is desirable to add a separate audio interface, instead of using a computer's built-in analog audio output.)
The types of connections between the audio interface and computer fall into just a couple of categories. These are typically Thunderbolt, USB or FireWire (PCI also is available with Mac Pro computers).
Some DACs, instead of connecting to the computer with Thunderbolt, USB or FireWire, accept digital audio over a standard connection known as S/PDIF or Toslink, or AES/EBU. Using these types of DACs entails a little more complexity than a Thunderbolt, USB or FireWire connection.
Many audio interfaces also include analog inputs for recording analog audio digitally with the computer onto the computer hard drive. This function is called an ADC or Analog to Digital Converter, and would be required to use recording software such as Channel D Pure Vinyl.
Except for the connection to the computer via Thunderbolt / USB / FireWire, you can think of the analog signal connections between the audio interface and your existing audio system as being exactly the same as connecting a tape deck (in the case of an ADC - DAC combination), or as an FM radio tuner or other source (in the case of a DAC - only audio interface for playback). The DAC output also can be used to directly drive power amplifiers, with the volume control performed by the audio player software.
|
|
|
After you have chosen the computer, the next step is to select an audio interface.
- If you only intend to play digital music files, buy a DAC type (output) audio interface.
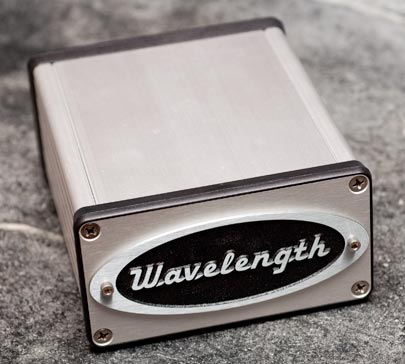
Wavelength Proton 96 kHz USB DAC (Audio Output Only)
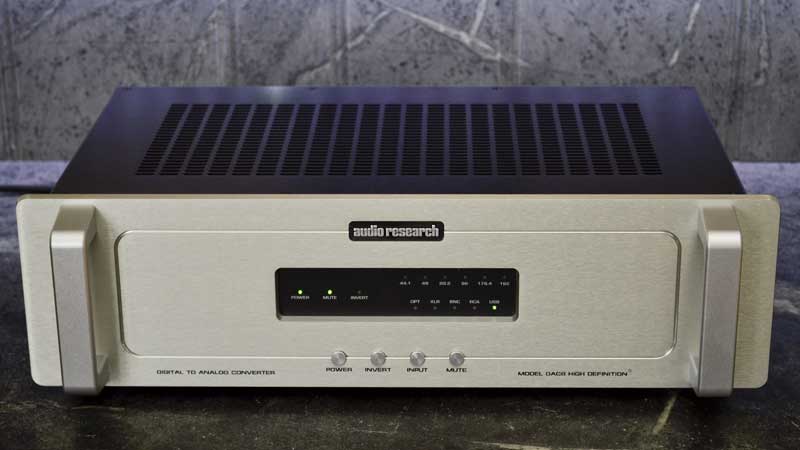
Audio Research DAC8 192 kHz USB DAC (Audio Output Only)
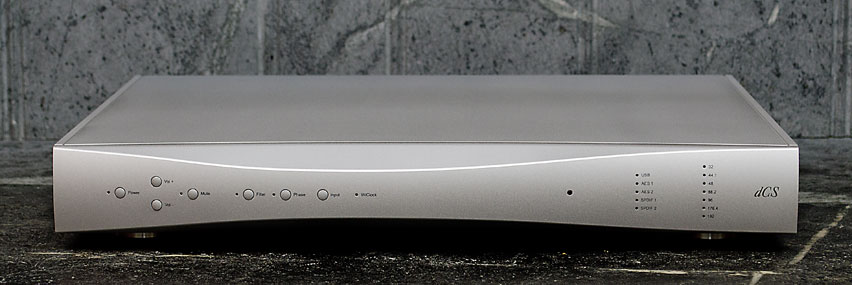
dCS Debussy 192 kHz and DSD USB DAC (Audio Output Only)
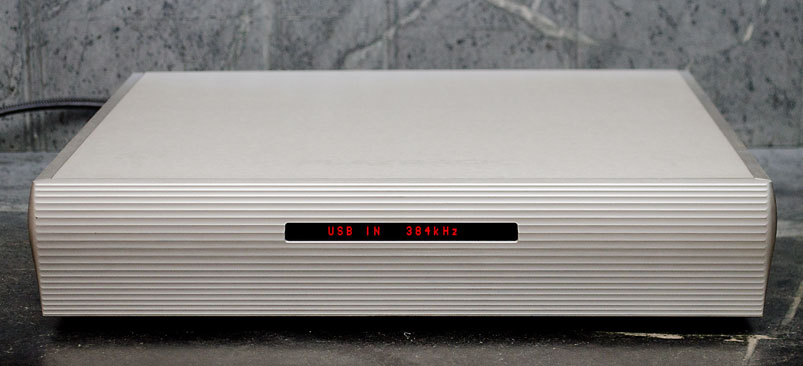
Playback Designs MPD-3 384 kHz and DSD USB DAC (Audio Output Only)
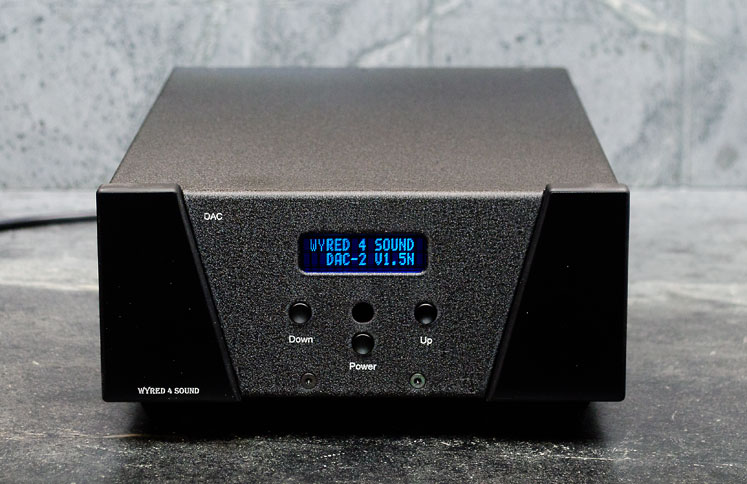
Wyred4Sound DAC2 192 kHz USB DAC (Audio Output Only)
- If you intend to play and record digital audio, buy an interface with both inputs (ADC) and outputs (DAC).
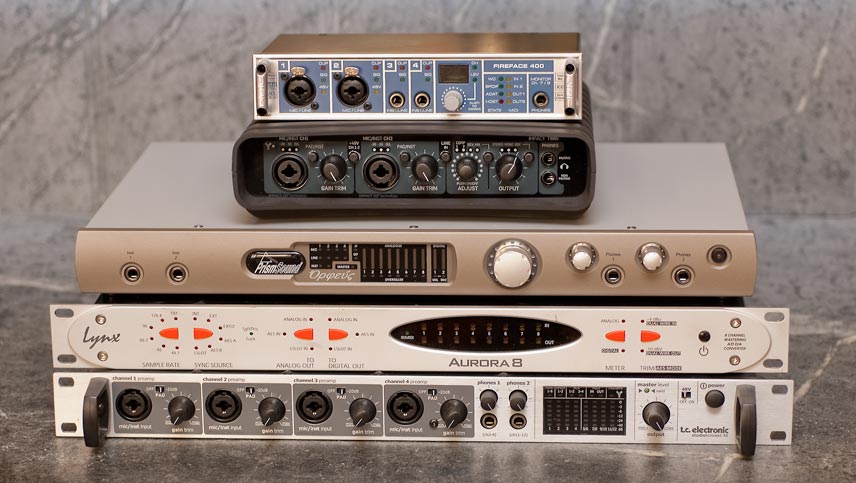
192 kHz Firewire audio interfaces with inputs and outputs top to bottom: RME Fireface 400, TC Electronic Impact Twin, Prism Sound Orpheus, Lynx Aurora 8, TC Electronic Studio Konnekt 48
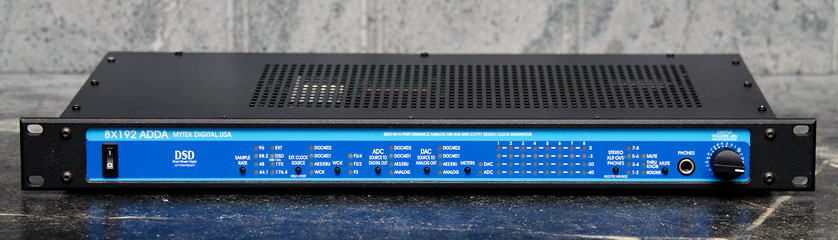
Mytek 8X192 Firewire ADC/DAC
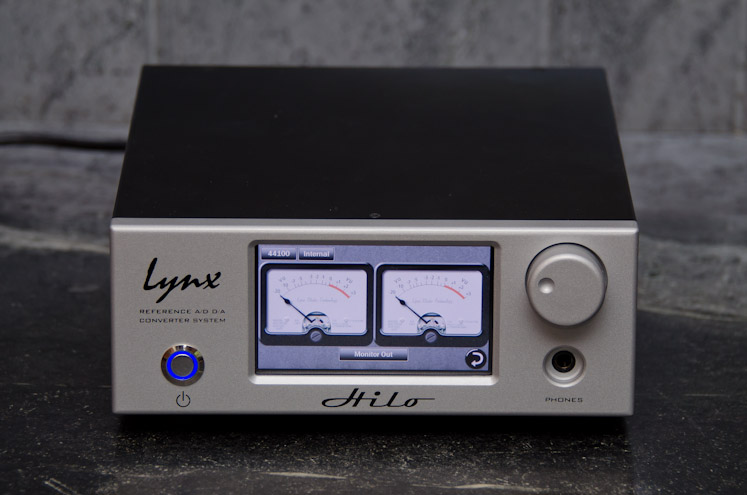
Lynx Hilo USB 192 kHz ADC/DAC
It's possible to use separate audio interfaces for input and output, but making the connections between the computer and separate interfaces can be very complicated; it comes down to synchronization of the digital inputs and outputs, and this may not be possible at all with some interfaces. (Using multiple interfaces in this way is beyond the scope of this document, but see this page for a full explanation.)
Note: "record" as used above may also be defined loosely as using the audio interface's inputs (ADC) as a source selector: for example, connect FM tuner, tape deck or other audio inputs to the audio interface. Channel D's Pure Vinyl software includes an input selector feature that can turn the computer - audio interface combination to a line level preamp and source selector (and high resolution digital audio recorder).
A selection of audio interfaces / DACs that use USB or Firewire connections are listed on this website (click the SUPPORTED SOUND CARDS link). (Note: the list of sound cards is not exhaustive. Any audio device supported by the Mac OS as an audio device also will be supported by Pure Music / Pure Vinyl.) The easiest to use computer audio setup will employ an audio interface or DAC that is connected to the computer via USB or FireWire (or also by PCI, for a Mac Pro).
In general, because of the way it's designed, Thunderbolt or FireWire demand less CPU resources than USB, though the difference has diminished with today's faster computers and USB 3.x. Either connection provides both power and data. Many USB and FireWire interfaces / DACs are powered over the USB / FireWire connection and don't require an external power supply. FireWire or USB 2.0 cables may be up to 15 feet long. Thunderbolt optical cables can be up to 100 meters long (and substantially more expensive than their copper counterparts). For additional technical comparisons between FireWire and USB, click here - though FireWire has generally been phased out in favor of Thunderbolt and USB.
IMPORTANT NOTE ABOUT USB DACs: Before purchasing a USB DAC, be sure to "read between the lines" regarding sample rate and bit depth support. Many, many so-called "audiophile" USB DACs, even new products introduced / being marketed as late as 2011, include outdated (> 10 year old) off the shelf USB interface chip sets that only support 16 bit data, and are limited to a maximum 48 kHz! This will NOT deliver the premium quality audio playback that you expect. As stated by one such manufacturer on their website, "the USB input is there for convenience as opposed to performance." That is a self-serving view not shared by many manufacturers that do have high resolution USB support.
Just because a DAC supports 192 kHz / 24 bit or 96 kHz / 24 bit, this might only be accessible via the DAC's digital input (S/PDIF) connections, which may require purchasing extra hardware, and still may not function as well as a well-designed, modern USB implementation supporting higher sample rates. The same is true of most phono stages with a "USB output." We know of at least one very expensive phono stage with a USB output that only supports a maximum of 48 kHz / 16 bit on the USB connection! This is very far from the highest fidelity that's possible today. If you choose a USB DAC, please support DAC manufacturers that have invested in delivering modern USB implementations, not those using old USB technology limited to CD quality digital audio. Modern USB audio interfaces can support sample rates up to 384 kHz on Mac computers made in the last 5 years (Intel processor).
DACs that only accept digital audio input (S/PDIF, optical, or AES/EBU) connections will require an additional Thunderbolt / FireWire / USB (or PCI) interface providing a S/PDIF, toslink or AES/EBU output, for supplying the digital format audio to the DAC.
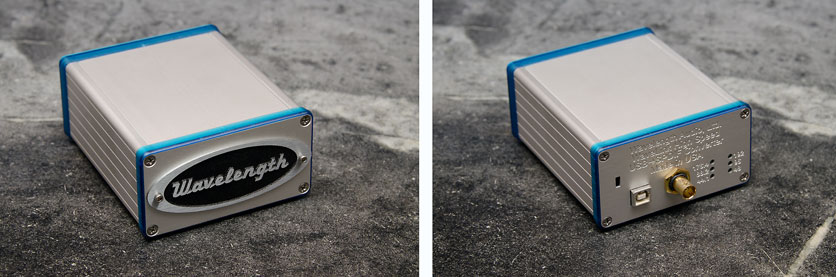
Example of S/PDIF Digital Output audio interface (Wavelength WaveLink). Use with DACs that don't have a built-in computer audio bus (FireWire, USB) connection.
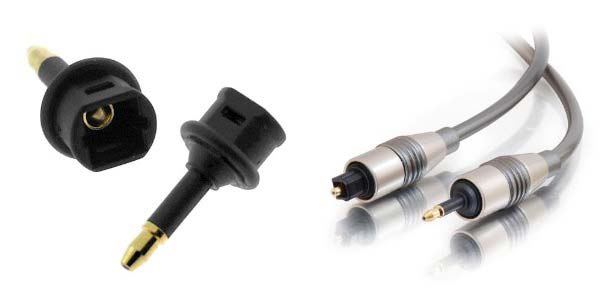
Optical / toslink connectors for Mac computers Left: mini toslink to standard toslink cable adapter; Right: mini toslink to toslink cable
Important: the built-in optical digital output of Mac computers introduced prior to 2010 is limited to 44.1, 48 and 96 kHz sample rates. The iMac, Mac Mini and MacBook Pro models from 2010 and later provide an additional choice of 88.2 kHz for the optical digital output. The maximum sample rate of the built-in optical or analog (headphone) output on any Mac computer is 96 kHz. Apple specifications stating higher supported sample rates on the built-in optical or analog output are incorrect. However, the HDMI output on current Macs can support up to 192 kHz, if connected to a component that also supports that sample rate.
It's also possible to use the HDMI port of the mid-2010 or later model Mac Mini to output digital audio at all common sample rates up to 192 kHz, but this requires a compatible HDMI receiving component, or else a device called an HDMI audio de-embedder. Contact Channel D for more information about such a setup.
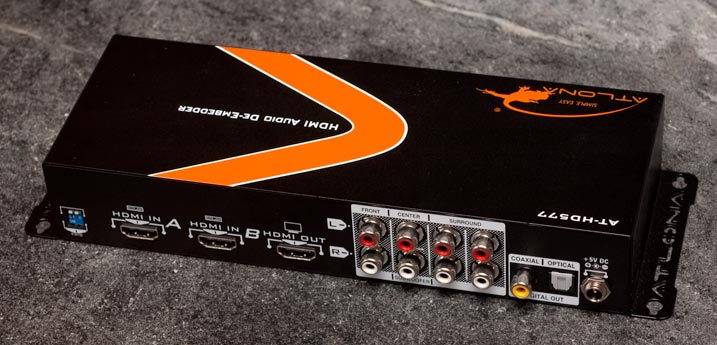
HDMI Audio De-Embedder
|
|
|
Audio interfaces intended for the audiophile market are frequently sold through brick-and-mortar dealers. This can have advantages in terms of support and assistance in setting up a system. "Audiophile" interfaces typically have higher profit margins, to support the higher operations costs of brick-and-mortar dealers.
Many conversations conducted with dealers who carry computer audio products convey the idea that one is less likely to find "pro audio" interfaces sold at traditional audiophile dealers, because of the much smaller profit margins on these products.
Economies of scale in the "pro audio" market segment (pro audio comprises a much larger market than audiophile gear), as well as the resulting tremendous R&D budgets have resulted in products with outstanding sound quality at very reasonable prices. Manufacturers whose products deliver outstanding value include TC Electronic, Lynx, RME, Prism sound and others. These products have reached a high level of maturity and are required to operate very reliably, because of needing to deliver flawless performance in a high-pressure, production type environment. The pro audio interfaces also typically feature more than two input and output channels, which can be useful for connecting additional analog input sources, or additional outputs used for multi-amping and crossovers for subwoofers, for example.
The audio interfaces / DACs listed on the SOUND CARDS page of this website include both audiophile and professional audio interfaces.
|
|
|
Example: Mac Mini (connections, left to right are USB, external HDMI monitor, Ethernet, and power); Wavelength Proton 96 kHz USB DAC shown (analog outputs)
|
|
|
Note: any pricing listed below is approximate as of July 2014. Interfaces can be purchased from online pro-audio dealers such as zzounds.com, audiomidi.com, fullcompass.com, sweetwater.com, etc. as well as amazon.com.
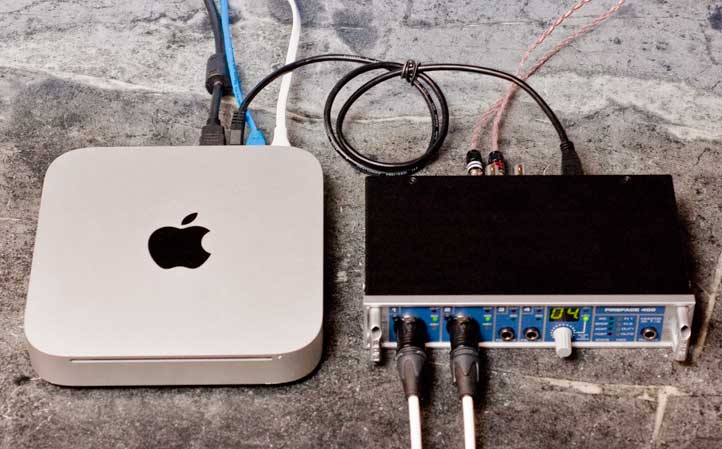
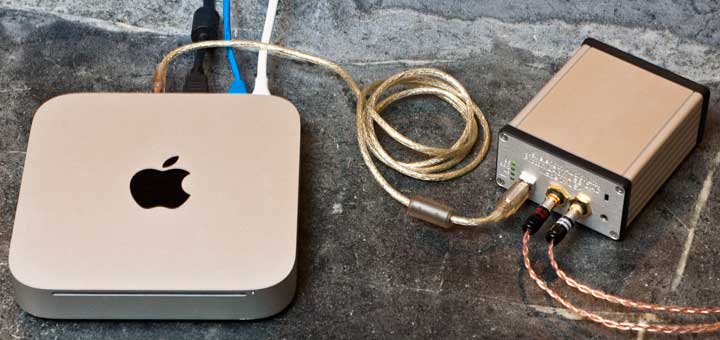
Example: Mac Mini (connections, left to right are external HDMI monitor, FireWire, Ethernet, and power); RME FIreface 400 FireWire audio interface shown (front analog inputs are used for turntable; analog outputs on rear)
Any of the audio interfaces listed below, or those listed on the SUPPORTED SOUND CARDS page. (Note: the list of sound cards is not exhaustive. Any audio device supported by the Mac OS as an audio device also will be supported by Pure Music / Pure Vinyl.) Interfaces indicated as (digital output) on that page only provide a digital (S/PDIF) data stream, and will require a separately connected DAC for analog output.
For use with Channel D Pure Music (playback) or Pure Vinyl (recording and playback). Interfaces except Lynx Aurora / Lynx Hilo and other line-level input professional mastering interfaces include suitable built-in analog signal conditioning for directly connecting a turntable with either MC or MM type cartridges, for use with Pure Vinyl's RIAA correction. All support 192 kHz. May require special cable for direct turntable connection, which can be ordered from Channel D. Some devices listed below also have more than two analog inputs and outputs, suitable for use as virtual line level preamplifier / source selector and / or multi-amp electronic crossover.
Example: Complete turntable playback / high resolution vinyl transfer / computer audio player setup: Mac Mini and TC Electronic Impact Twin 192 kHz FireWire Audio Interface
- TC Electronic Impact Twin (FireWire) ($400)
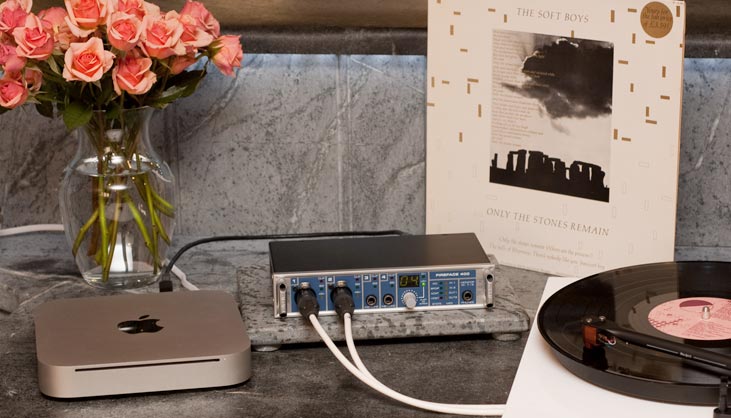
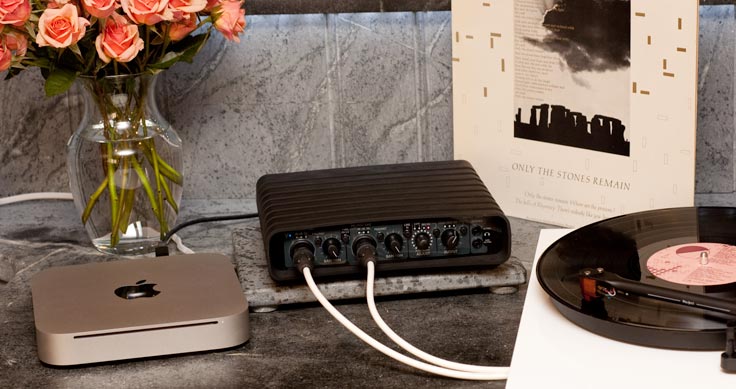
Example: Complete turntable playback / high resolution vinyl transfer / computer audio player setup: Mac Mini and RME Fireface 400 192 kHz FireWire Audio Interface
- RME FireFace UCX (USB) ($1399) or RME BabyFace (USB) ($699)
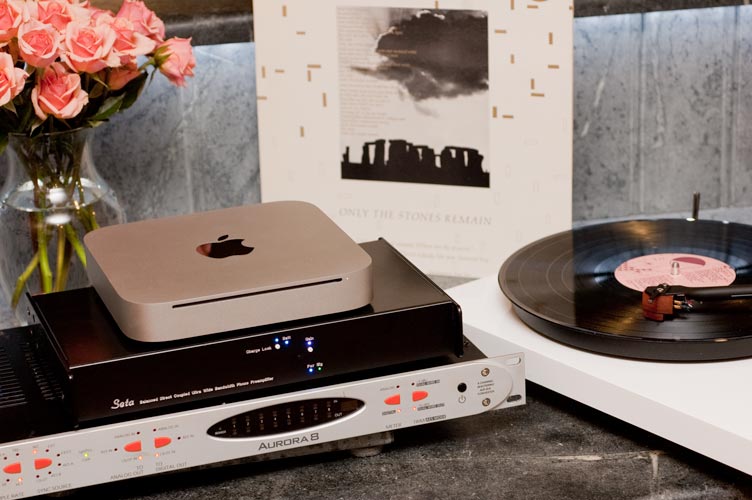
Example: Premium turntable playback / high resolution vinyl transfer / computer audio player setup: Lynx Aurora 8, Seta Model L Phono Preamplifier and Mac Mini ("stacked" here for illustration)
- Lynx Aurora 8 with LT-FW (FireWire) ($2299) or Lynx Hilo (USB or Thunderbolt, $2499 or $2799 respectively) plus either Channel D Seta Piccola, Lino C or Seta Model L phono stage.
- Prism Sound Orpheus (FireWire) ($4500)
In general, the more expensive interfaces / combinations offer lower levels of noise, distortion and digital jitter, delivering a more faithful reproduction of analog audio.
|
|
|
It's good computer operating policy not to store large data files which may require real-time access (such as digital music) on the same hard drive as the computer operating system (the startup or boot drive).
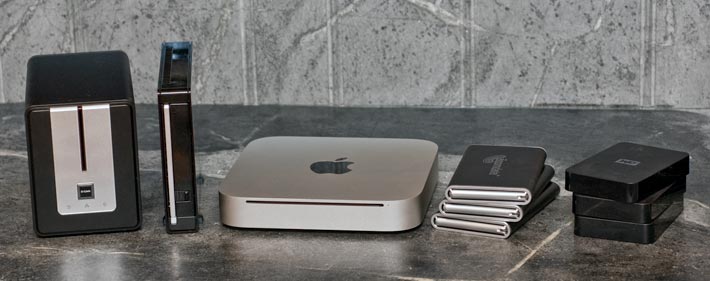
Left to Right: 2-drive NAS (uses 3.5" drive mechanisms); 3.5" desktop hard drive (external power supply); Mac Mini; 2.5" FireWire / USB combo hard drives (bus powered); 2.5" USB hard drives (bus powered)
Even with lots of RAM, the operating system may need immediate access to the startup drive for memory paging, which also would be most likely to occur while loading tracks in to memory (idle application memory can be "paged" or copied temporarily to disk; this is a common operation performed by the computer operating system). This could cause a "race" condition where both the OS and the music software are contending ("in a race") for hard drive resources. This will affect performance. On the other hand, typical computer users aren't concerned about high performance audio, so the default system setup (storing user data such as photos, word processing documents, etc. on the startup drive) is adequate.
Pocket sized, bus powered hard drives. Left, 500 GB (assembled from combo enclosure and 2.5" mechanism); Right, 1 TB prepackaged 2.5" USB (Western Digital Elements SE).
The advantages of 2.5" hard drives are portability and bus power, but 3.5" drives will provide better performance. Important: If recording (transcribing vinyl), use a 3.5" disk drive.
USB / FireWire: Hard drives often used for computer music storage will have the same types of connections as audio interfaces: USB or FireWire.
It's best to choose the hard drive(s) after choosing the computer and audio interface. The reason is that whatever connection "bus" is used by the audio interface, the storage interface should be different for best performance. For example, USB hard drives should be used with a FireWire or Thunderbolt audio interface, and vice versa. This is to avoid bus contention issues from occurring, because the audio stream is a real-time stream that cannot be interrupted. (Theoretically, it is possible to daisy-chain hard drives along with audio on a FireWire bus... but this is not advisable.)
The USB 3.x stack on modern Macs is more tolerant of having USB storage and audio devices in use. However, don’t use a USB hub for any high bandwidth or real-time connections. Plug audio and storage (if not using a NAS connected via Ethernet) devices directly into separate computer USB ports. Aside from that, if it’s possible to use a Thunderbolt connection for storage or for the audio device (ADC/DAC), by all means do so. No issues with having Thunderbolt storage and audio being used on the same computer.
Many external hard drives offer a combination or choice of connection types, so one is not locked into using USB, Thunderbolt or FireWire.
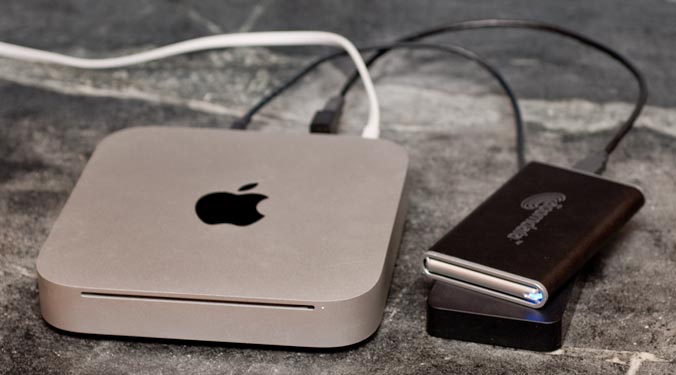
Bus powered 2.5" FireWire and USB hard drives connected to Mac Mini
SATA: The SATA (Serial Advanced Technology Attachment) hard drive interface is available for use with the Mac Pro. SATA hard drives can be used internally or externally (with an expansion card). SATA is extremely fast: practical transfer rates well over 100 megabytes per second, compared to 20 - 40 megabytes per second for FireWire / USB 2. This translates to faster CD ripping and faster loading of tracks for Memory Play. SATA is a very compelling reason to choose a Mac Pro computer. Adding SATA drives takes just a few minutes, with no tools required. Current prices (October 2012) are around $120 for 2 terabytes to $300 for 4 terabytes (per drive mechanism).
NAS: Another class of hard drive connection is the NAS drive (Network Attached Storage). This is connected via Ethernet. The advantage is expandability and flexibility, but a NAS can be more difficult to set up than a USB, FireWire or Thunderbolt connected hard drive. For computer audio, a NAS should only be connected via a hard-wired (physical) connection, not wireless Ethernet (WiFi). Wireless has insufficient bandwidth for smooth operation when moving or copying large files, such as high resolution digital audio. A NAS drive can be used in conjunction with any type of audio interface connection. Real world transfer speeds for better quality NAS drives using a disk array are over 80 megabytes per second, using a Gigabit Ethernet connection (communication overhead reduces the effective transfer rate from "gigabit" rates).
Thunderbolt: Thunderbolt - connected disk arrays provide faster connection performance than other options, but are not quite as expandable as an Ethernet connected NAS.
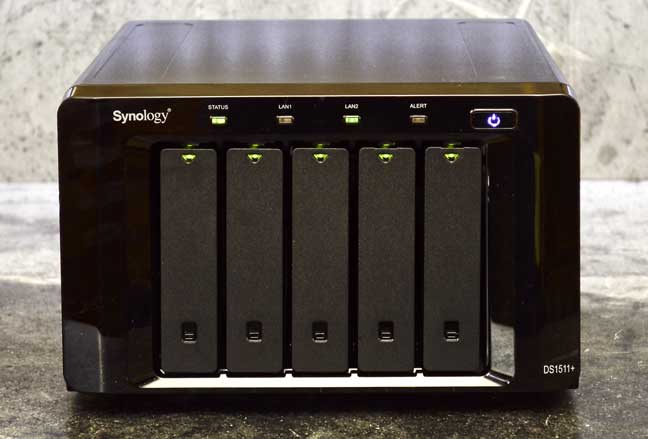
5-drive NAS, up to 12 terabytes (using 3 terabyte mechanisms) fault tolerant (RAID 5) storage, expandable with add-on modules, hot swappable mechanisms, automatic volume rebuild after drive replacement. (ca. $800 for NAS plus cost of drive mechanisms)
Specialty: "Hardened" fireproof / waterproof and impact resistant drive mechanisms also are available, for secure local backup and travel.
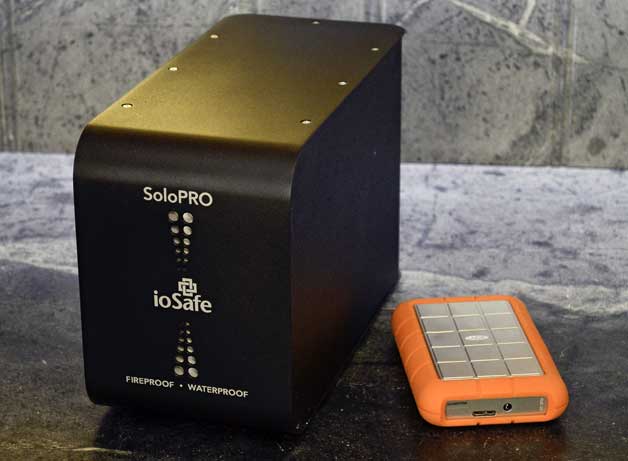
Waterproof and fireproof 2 terabyte USB / eSata external disk drive; impact resistant, portable 2.5" 1 terabyte USB drive
For a specific recommendation for a hard drive for your computer audio setup, contact Channel D Support. Links to specific products aren't included here, because the product offerings are subject to constant improvement and can change on a weekly basis.
|
|
|
The headings below provide more detail on the above topics, as well as optional upgrades or enhancements for your computer audio system.
|
|
|
One important hardware difference between pro audio and audiophile is that audiophile DACs usually provide consumer type RCA (unbalanced or single - ended) connections, while pro DACs / audio interfaces only have balanced, XLR or 1/4" connections. However, this is easily addressed (if you don't have audio gear with balanced connections) with simple XLR to RCA or 1/4" to RCA (use 2 conductor TS adaptors, as shown below, not 3 conductor TRS). Note: only use a simple XLR to RCA adaptor for output connections; a specially wired adaptor is needed for connecting a turntable to audio interface microphone inputs. Custom turntable adaptors can be ordered from Channel D.
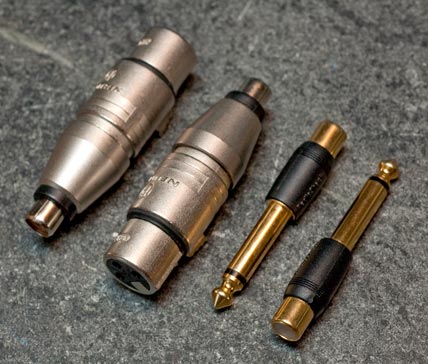
XLR to RCA
and
TS to RCA
adaptors (click to obtain from Parts Express)
The balanced output to single ended adaptors shown above connect one "leg" of the balanced signal to ground. These are compatible with the majority of pro audio audio interfaces released in the last several years. However, certain balanced output designs cannot function properly with this type of adaptor. Consult the documentation for your audio interface or contact the manufacturer for more information (we also can look up this information for you). If your audio interface has balanced and single ended outputs, and you need single ended outputs, an adaptor is not needed.
|
|
|
It's true: word length (resolution) is reduced with a digital volume control!
This effect is mitigated by dithering. Dithering reduces the distortion caused by word length reduction, by mathematically randomly "jiggling" the low order part of the digital data, when the volume is reduced.
A properly dithered digital volume control will introduce no audible sound quality degradation when listening to music between -6 and 0 dB. A digital volume control may be audible depending on the resolution of the audio system (and how carefully one is listening) beginning at settings below about -12 dB.
An additional balancing factor is that the distortion level of DACs tends to rise at signal levels above -10 dB vs. digital full scale. By increasing the volume above -10, more resolution is preserved, but at the expense of higher (measurable) distortion. The net result of this trade-off is that volume levels between -12 and 0 dB represent the "sweet spot" of a digital volume control. And depending on the design of your DAC, because of increasing distortion at higher output levels, the overall sound quality may well be better with digital volume settings below 0 dB.
A dithered digital volume control easily can match the quality of an analog volume control if the overall gain structure of the system (see below) is properly set up. In other words, the loudness of your system when you are actively engaged in listening to music should be obtainable with a digital volume setting between -12 and 0 dB.
Note: If your music collection includes lossy compressed music (MP3 or AAC), in particular, "loudly" mastered tracks which reach 0 dBFS, using a digital volume control will be beneficial. At least as far as Channel D's Pure Music / Pure Vinyl playback software is concerned, the digital "overs" generated internally by the lossy to PCM audio converter will be preserved by setting the volume control to -1 or -2 instead of 0, regardless of whether or not you choose to use a strictly analog means of controlling the volume.
Another important consideration is the convenience of the digital volume control. This can be operated with a remote, such as Apple's Remote App on an iPad/iPhone/iPod Touch, or with a wireless Bluetooth mouse or keyboard.
Digital Volume Setup / System Gain Structure
Gain structure (a term very commonly used in the pro audio world) is something that must be wrestled with in a critical sense when it comes to digital audio reproduction, and can be tricky to get set up initially. In most cases this will involve some form of analog gain adjustment in the signal downstream from the DAC. However, once properly set up it shouldn't require further attention.
If the playback level of your system is much too loud at a digital volume setting of -6 dB, and if you have to use volume settings quieter than -12 for a comfortable listening level, then you must attenuate the output of the DAC in the analog domain for the best sound - either with a line level preamp, an analog attenuator between DAC and power amplifier, or a power amplifier trim adjustment.
If your system has an analog volume control, or you have a power amplifier with an analog volume trim adjustment, first set that to minimum. Then, set the digital volume volume in the player software to -6 dB. Next, increase the analog volume control to obtain a comfortably loud listening level. From there, you can use the digital volume control to make the sound a little louder or a little quieter, as desired, and not have to adjust the analog volume control again.
Note: when listening at quieter, "background" music levels, where the ambient noise level becomes comparable to the music level, or if not engaged with careful listening, large amounts of digital attenuation are acceptable. At -48 dB, if starting with 24 bit audio, and using a 24 bit DAC, the signal is effectively down to 16 bits of resolution. This is still equivalent to CD quality.
If an analog volume control isn't available in the signal chain, and the playback level is too loud, use a simple passive analog attenuator between DAC and power amplifier:
http://www.markertek.com/Audio-Equipment/Audio-Interface/Attenuation-Devices/Audio-Technica/AT8202.xhtml
http://www.markertek.com/Audio-Equipment/Audio-Interface/Attenuation-Devices/Whirlwind/IMPAD10.xhtml?IMPAD10
Multiple volume controls in the system
If your system has more than one digital volume control (such as in your DAC and in your playback software), use the volume control in the software or the digital volume control in the DAC but never both. The preferred digital volume control to use for volume adjustment in such a system is the one that applies dithering. To disable the other digital volume control(s), set it / them to 0 dB (no signal gain or attenuation).
Likewise, do not routinely adjust both digital and analog volume controls at the same time. Either set the digital control to 0 dB (or slightly lower, as explained above) and exclusively use the analog volume control, or adjust the analog volume (gain structure) to achieve the digital volume sweet spot as described above, and don't touch the analog control again.
|
|
|
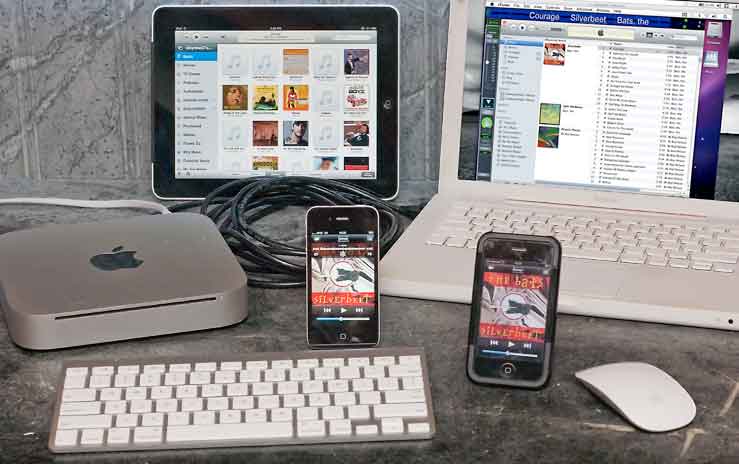
Remote control options: "Headless" (no monitor) Mac Mini shown connected via wired Ethernet to MacBook laptop using free bulit-in (on Mac OS X) Screen Sharing to control and operate the Mini. It's just like operating the Mini via its own mouse, keyboard and monitor.
Also shown are an iPad, iPhone 4 and iPhone 3 running Apple Remote App to control iTunes on the Mac Mini.
The Apple Wireless (Bluetooth) Keyboard and Magic Mouse also represent viable remote control options. The space bar on the elegant and compact Apple Wireless Keyboard makes for an easy target for toggling play / pause.
The Apple Remote App runs on iPad/iPhone/iPod Touch, connects via WiFi and transparently controls iTunes (including Channel D Pure Music / Pure Vinyl).
WiFi can be used for screen sharing (VNC) control of the music server computer for general setup on an iOS device, but will be cumbersome for continuous use (limited by the bandwidth of the WiFi connection and the need to transmit graphics-heavy screen images and processing on the controlling device).
Wired Cat 5e / Cat 6 Gigabit Ethernet remote control offers the best performance, and can extend to multiple computers up to 100 meters / 330 feet away. However, if your WiFi connection is good (low interference in your locale) the performance of a screen sharing connection between computers will be the same as a wired connection. Every remote "station" can act as a control "master," as though sitting at the computer server (here, the Mac Mini) with a connected monitor, mouse and keyboard.
All remote controls shown above can connect and function simultaneously.
Note: starting with OS 10.8, "headless" operation on a Mac Mini sometimes throttles the graphics chip for power consumption, causing erratic performance. However this is easily corrected by attaching an inexpensive EDID device such as this one from OWC.
|
|
|
More memory is always better, from the standpoint of better computer operation. It is quite easy to install third party memory (RAM) in all new Macs... this can be done in just a few minutes (and without any tools on a Mac Mini or Mac Pro).
Get your feet wet with the standard memory configuration supplied with whatever computer you buy, and easily and inexpensively upgrade later. Third party memory is significantly less expensive than (and just as suitable as) the build-to-order memory from Apple.
When you upgrade the RAM, consider purchasing an 8 GB (2 x 4) upgrade, which is a very cost effective way to improve computer performance, and will deliver more bang for the buck than any other computer upgrade you can perform. (As of late 2012, 16 GB upgrades have fallen in price under $100, making them an attractive value.)
Memory can be purchased from places like Amazon, OWC or Newegg. OWC has a smaller selection and higher prices, but is Mac-specific and also offers instructional, free, do-it-yourself installation videos. Newegg (and Amazon) are cheaper and offer a larger selection, but requires more technical expertise in selecting products (most products at newegg are directed at the Windows market, but most of the products also are compatible with Mac hardware).
Note: memory is not easily upgradeable in the late - 2012 iMacs because of the new slim design, so memory should be configured at the time of purchase. All models are shipped with 8 GB RAM, but given the difficulty of upgrading later, if budget is not an issue we recommend purchasing the 16 GB memory upgrade. All other Mac computers newer than 2010 have user-upgradeable memory.
|
|
|
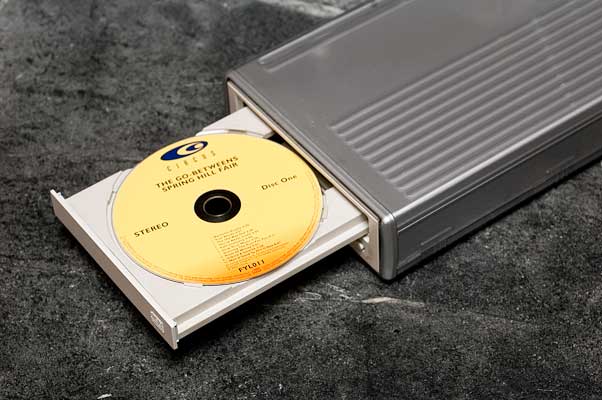
Tray-type external optical drive
Buy an external, tray-type mechanism for CD ripping. Similar specifications aside, you will get far better real-world performance (reliability of rips and speed) with an external tray-type CD / DVD mechanism than a built-in slot-loading drive. External mechanisms are mechanically usually much quieter in operation, as well.
An external DVD-R drive with a tray-type mechanism (not slot loader), connected by USB 2 or Firewire is best. (Don't buy a drive for use on the Mac platform if it doesn't offer "DVD-R" support, and only has "DVD+R" format.)
The choice of interface follows the same rule as the music storage. If your audio device is FireWire, the hard disks and CD/DVD drive should both be USB, and vice - versa.
You can find a good selection at Newegg at good prices. To help in choosing a drive, the customer reviews are frequently useful. Search for "Mac" to find if other Mac users have used products (even if the stated product compatibility only mentions Windows). Also search for "noise" or "quiet" to find drives reported as being mechanically quiet.
A Mac-oriented vendor like OWC has a smaller selection and higher prices, but is better if you feel uncomfortable choosing products from a place like Newegg that's mainly focused on the Windows platform, because OWC carries Mac-specific solutions.
For a specific recommendation for an optical media drive, contact Channel D Support. Links to specific products aren't included here, because the product offerings can change on a weekly basis.
|
|
|
Solid state drives (SSDs) can be used instead of a standard, magnetic platter or "spinner" type hard drive for dramatically improving computer performance and responsiveness. SSDs are connected to computers in exactly the same ways as spinner drives. Usually, an SSD is installed internally, replacing the original spinner drive, and used to store and access the operating system.
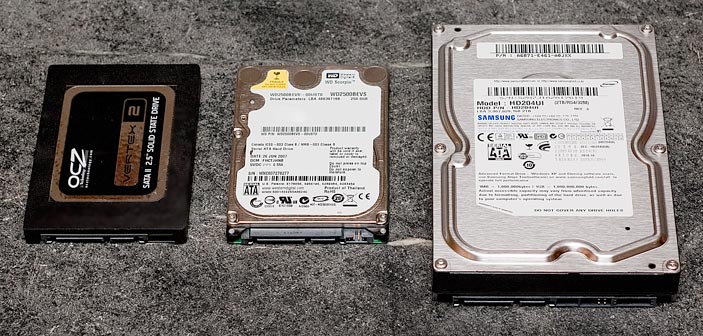
"Bare" drive mechanisms. Left to right: 2.5" solid state drive, conventional 2.5" and 3.5" magnetic platter type drives.
The best use of an SSD is for storing and running the computer OS. Store your music media on conventional hard drives, and leave a large part of the space on an SSD free for routine memory paging operations performed by the OS.
Using an SSD to store music files, or for a temporary music repository for playback as an alternative to Memory Play (with music players lacking this feature) is not a prudent approach to managing and playing your digital music. First, the audio information must still be transferred from the SSD to RAM to be played. With true Memory Play, all audio is already resident in and played directly from RAM. With the functionality of Memory Play mode in Channel D software music player products, once the music is loaded into RAM, any influence a spinner mechanism may have in affecting computer audio quality is nullified.
A good capacity SSD for use as a startup drive for OS X is in the range of 100 to 120 GB or more. Companies like OCZ, OWC and Crucial are recognized for currently providing the highest performance, long life SSDs. However of late, the prices of Apple's SSD upgrades have come down, making Apple-installed SSDs a viable alternative (with the advantages of warranty support plus direct OS support for special SSD wear-levelling and TRIM functions). See the section of this web page on selecting hard drives for links to companies selling these products.
For a specific recommendation for an SSD for your computer audio setup, contact Channel D Support.
Finally, the optimum high performance computer music player setup is to both install an SSD and maximize the computer RAM, because the effect of both upgrades is synergistic. This also will noticeably improve computer responsiveness, making using the computer music server an even more enjoyable experience.
|
|
|
Here's a question: Would you think of driving a long distance motor trip without having a spare tire? Computer hard drive failures require the same diligent planning for them as unexpected tire failures! If you believe a spare tire "backup" is an essential part of driving, believe that computer backups are an essential part of operating any computer system. (To the above analogy, run-flat tires or inflation kits are not foolproof insurance against sidewall or wheel damage, the same way a RAID array - see below - isn't foolproof insurance against data loss.) If you've never had a problem with the computer before, here's another analogy. Not having a second engine on a passenger aircraft despite there "never before being an issue" might seem OK, until there is an issue - and there always will be. Not a matter of if, but when.
Plan on buying at least two of each hard drive used for media storage / ripping, and keep a copy as backup for when a hard drive failure occurs (and it will). This amounts to relatively inexpensive insurance against having to spend considerable time re-ripping a media collection from CDs or vinyl, re-purchasing digital downloads, or losing valuable recordings you may have made. It goes without saying that you should also keep a backup of your computer's system / user drive, and especially make a backup before performing any OS or major software updates, so that you can restore the system should any unexpected issues arise.
Drive failure need not occur catastrophically (drive refuses to start up or mount). Often, hard drives will develop bad sectors and as they are filled up, may begin to be unable to store files. This can occur silently and go undiscovered until trying to read the file again, such as to play a music track. This is one very good reason to create a backup copy of things saved to a hard drive as soon as possible.
Media / computer backup is part and parcel of having a computer system and is a long established standard operating procedure with a computer. As media storage capabilities increase dramatically, so do the amount of your musical assets potentially lost in a hard drive failure. Don't let this happen to you! Be sure to keep backups of everything. It is extremely unpleasant to be confronted with a hard drive failure without having a current backup.
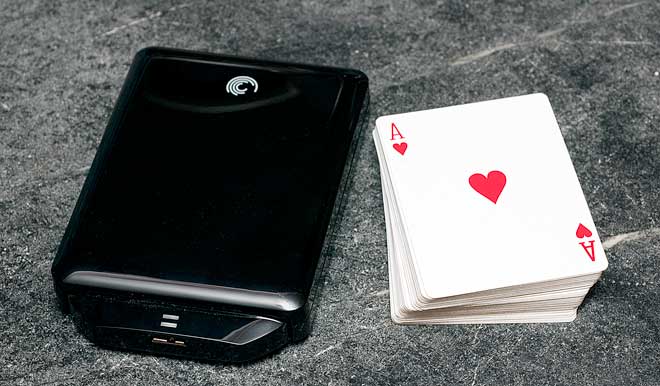
Seagate GoFlex 1.5 terabyte USB hard drive (bus powered)
A prudent approach is to make a copy of your digital media and keep it offsite, such as at your office, or in a bank safe deposit box. Today's small, portable 2.5" mechanisms holding 1 - 1.5 terabyte are about the size of a pack of playing cards and easily transported or stored.
A very good approach is to maintain three copies of media. One is the active copy used for normal playing and ripping / transfer / recording. The second is used to back up the first on a regular basis (as often as new music is added). This backup should be rotated with a third copy, stored offsite, on a daily, weekly or monthly basis: whichever provides the best combination of comfort and convenience for you (and depending on how often the media collection is added to, and how much time you can afford to lose in re-creating what wasn't backed up).
Besides manually copying files to make backups, there are various third party software packages that will automate the backup process. Apple provides the Time Machine automatic backup function of its OS X operating system. However, for various reasons, this may not be the optimum approach for music backup. The shareware utility Carbon Copy Cloner is a widely used backup utility that easily can be used to make a backup copy of your entire startup hard drive, as well as incremental backups. It also can create a "clone" of the startup drive that can be used to start the computer in an emergency, should the startup drive fail.
RAID setups: there is an additional option of using a RAID (Redundant Array of Independent or Inexpensive Disks) setup. Certain RAID configurations automatically mirror the contents of one hard drive to another (RAID 1) or multiple drives (RAID 5). This is not a substitute for a backup. RAID is best for enterprise computer operations where any downtime must be scrupulously avoided. RAID only protects against mechanical hard drive failure, not against other problems that can arise, such as directory corruption or user error (which will destroy data on all of the mirrored drives) or a physical catastrophe (fire or other disaster), because the drives are kept in proximity. Any of the strategies outlined above are better than RAID, if the goal is having a data backup.
One other bit of advice: when setting up or "formatting" a new hard drive for the first time, there is an option available (in Apple's Disk Utility application, used to format the drive) to write zeros to all drive sectors during the formatting process. While a standard format of a hard drive takes just a few seconds (to write the initial directory information to the drive), zeroing the mechanism can take several hours, depending on the capacity. This can detect defective mechanisms at the "infant mortality" stage, and the extra setup time is well worth it for this reason. Just arrange to format new drives when the computer isn't being used, such as overnight. Think of it in the same way as breaking in a new audio component...! It's no guarantee that all defective mechanisms will be screened, or that a later failure won't occur, but it is a prudent thing to do. (Zeroing should not be done when formatting a solid state drive.)
When setting up a hard drive to use as backup, without getting into specific reasons, don't name the hard drive volume exactly the same as any other drive mounted (local or network) / used on the computer.
|
|
|
One of the putative attractions of the Windows platform is the ability to customize and tweak a plethora of OS and hardware settings to realize incremental improvements in performance.
However, the Mac OS, being based on UNIX, is tuned to work more efficiently and smoothly as a whole, and unless you are very, very sure about what you are doing, it is possible to introduce changes by disabling seemingly unrelated system services that can cause unpredictable or unexpected computer (not just audio playback) behavior. For this reason, we strongly advise not tweaking the Mac OS (aside from the audio player-friendly system settings and configurations listed below).
Another reason becomes evident when Apple delivers OS updates, which either will invalidate any OS tweaks, or cause further unpredictable behavior. The goal of the Mac OS is making things less confusing and complicated, not more. Take it from a seasoned developer of products on the Mac OS platform: keep the computer as "vanilla" as possible, or you invite unforeseen headaches down the road. The behavior of any process prioritization or service shutdown scripts may be OS version dependent, and could be broken or cause unexpected side effects in later OS releases. Are you ready and willing to take on the responsibility of testing and revalidating scripts or tweaks every time Apple releases an update, or troubleshooting unexpected issues?
A highly-tweaked computer (especially running Windows) can be difficult and time-consuming to maintain in reliable operating condition. And let's say a couple years down the road, the computer (or motherboard on a custom Windows PC) fails. Good luck finding the same motherboard as a new replacement part (and recreating the same hardware setup)! All the motherboard and hardware dependent tweaks will have to be re-optimized for the latest and newest motherboard... potentially taking months of effort (if you know what you are doing).
On the other hand, running a vanilla Mac OS computer, in the unlikely event that the computer should stop working due to a hardware failure - or should you wish to upgrade to a new computer - you can rest assured that not only will your computer music server setup run on a newly purchased or upgraded computer - it will automatically run even better.
Mac Computer Settings - "Dos and Don'ts" for Best Audio Performance
- Don't share audio device and storage buses:
- Do use USB2, SATA or a NAS for audio storage in conjunction with a FireWire audio device
- Do use FireWire, SATA or a NAS for audio storage in conjunction with a USB audio device
- Don't daisy-chain any other FireWire component with a FireWire audio interface
- Don't use a "hub" or port expander with an audio interface
- Disable Computer Sleep in the Energy Saver System Preferences (set to Never)
- Disable Automatic Check for updates (Software Update Preferences)
- Run laptop computers from the power adapter (see Select a Computer)
- Disable Hard Disk Sleep in the Energy Saver System Preferences (optional)
- Disable the Display Screensaver (System Preferences)
- Don't store audio files on the system disk (see Music Storage)
- Disable Spotlight indexing on disk used to store audio
- Wait until Spotlight indexing is complete, on disks using it
- Don't use Internet web browsers while listening to music, especially when playing high resolution audio
- Don't run other audio applications (except iTunes) at the same time as Pure Music or Pure Vinyl
|
|
|
A Mac Mini or other Mac computer also can serve as the centerpiece of a home theater (video) system, while delivering the same stunning audio quality as when playing music. These additional benefits are something that can't be accomplished with prepackaged music servers.
The computer can be used to directly drive a high definition TV, via a standard HDMI, DVI or XGA monitor connection. 720p or 1080p monitors / TVs are directly supported by the Mac.
Play DVD movies with the internal optical drive of the Mac. Just insert a DVD and the Apple DVD player application automatically launches and begins playing the DVD. The video can be played in a computer window or fill the screen. Your previous DVD player can be retired...
Receive terrestrial HDTV broadcasts with an inexpensive USB dongle from ElGato (plus external antenna) for the highest quality HDTV display, in a separate window or fullscreen. Record HDTV content for later viewing. Realtime video can be paused when you leave the room, or queued in advance to skip commercials when viewing the show.
Stream movies from Netflix. All it takes is an Internet connection and a Netflix account. No special hardware required. Can watch in a window, or fullscreen.
Remote control: an Apple wireless Magic Mouse and perhaps their elegant, compact wireless keyboard. For the latter, pressing the space bar toggles between play and pause in all of the applications above. Much easier than hunting for the play/pause button on a regular remote.
All of the above can be accomplished with just two pieces of home theater hardware: a Mac Mini (or other Mac), connected to an HDTV monitor (via HDMI, DVI or XGA).
|
|
|
Essentials (choose in listed order)
- Step 1. Computer (Choose One)
- Mac Mini
- iMac 21.5" or 27"
- Mac Pro
Computer will require external monitor (Mini, Pro) and keyboard (Mini) for initial setup
- Step 2. DAC / Audio Interface (see above sections for selection guidelines)
- Audio Interface with Outputs and Inputs: Play, Play/Record, Analog Source Switching
- DAC / Audio Interface with Outputs Only: Play Only
- Step 3. Hard Drive for Music Storage (Choose One) buy two, use one for backup
- 2 TB Plug and Play (Universal: Firewire and USB 2)
- "DIY" 2 TB Mechanism and Enclosure (Universal: Firewire and USB 2)
Options
- RAM Upgrade (Choose One; All RAM is Easy to Install)
- Mac Mini
2X4 GB
- iMac 21" or 27"
2X4 GB
- Mac Pro
3X4 GB
(Mac Pro has 3 channel RAM, upgrade in groups of 3)
- Solid State Drive (OWC will install in your computer for a fee)
- 120 GB
- Backup Software
- Super Duper
- Tray Type Optical Drive (MUCH better than Slot-Loading Drive for CD Ripping)
- Universal FireWire, USB
Icing on the Cake
- Terrestrial HDTV Receiver / Recorder (requires external antenna OR cable connection)
- ElGato EyeTV
- Netflix Subscription (Instantly watch movies on your computer)
- Netflix
|
|
|